Simple DIY Wooden Wall Art: A Chic, Beginner-Friendly Weekend Project

Welcome to the world of woodworking! You don’t need expensive tools or advanced skills to create something beautiful for your home. This guide will walk you through the process of making a striking piece of geometric wooden wall art using only basic hand tools. This project is designed specifically for beginners, emphasizing safety, simplicity, and a polished final result. Let’s get started.
The Best Wood for Your Project
For a project like this, where we are creating a layered geometric pattern, you want wood that is stable, easy to cut, and takes finishes well.
- Reclaimed Pine: As shown in our opening image, using aged or reclaimed pine is the perfect choice for a rustic, textured look. It’s affordable, lightweight, and full of natural character.
- Dimensional Pine/Whitewood Boards: If you are buying new wood, 1/4" or 1/2" thick pine “craft boards” from a big-box hardware store are excellent. They are inexpensive, straight, and soft, making them easy to cut by hand.
Tools You’ll Need
We’ve kept this list strictly to simple hand tools. You do not need any power saws for this project.
- A Sharp Hand Saw: (A “crosscut” saw is best for cutting across the wood grain).
- A Miter Box: (Crucial for making perfect 45-degree and 90-degree cuts by hand).
- Hammer and Small Brads/Nails: (Size 1" or smaller).
- Tape Measure or Ruler: (For accurate measurements).
- Pencil: (For marking your cuts).
- A Set of Small Wood Clamps: (Optional, but very helpful for holding pieces while they dry).
Step 1: Design and Plan Your Geometric Pattern
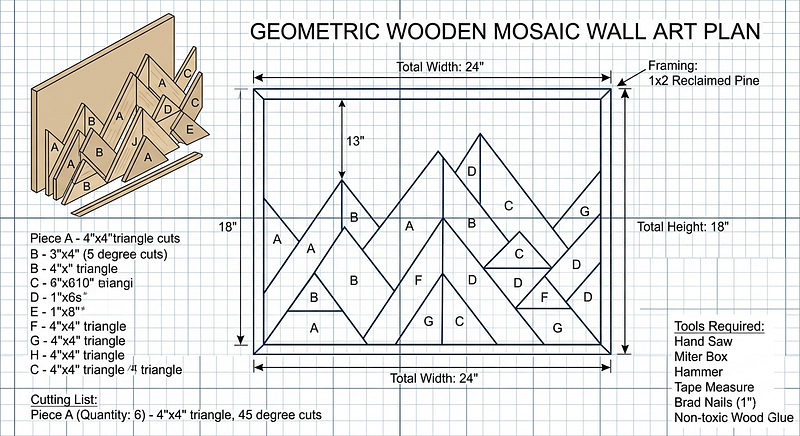
The first step is deciding on your pattern. While our final piece looks complex, it’s really just a collection of simple 45-degree and 90-degree geometric cuts. Refer to the blueprint (below) for a basic layout.
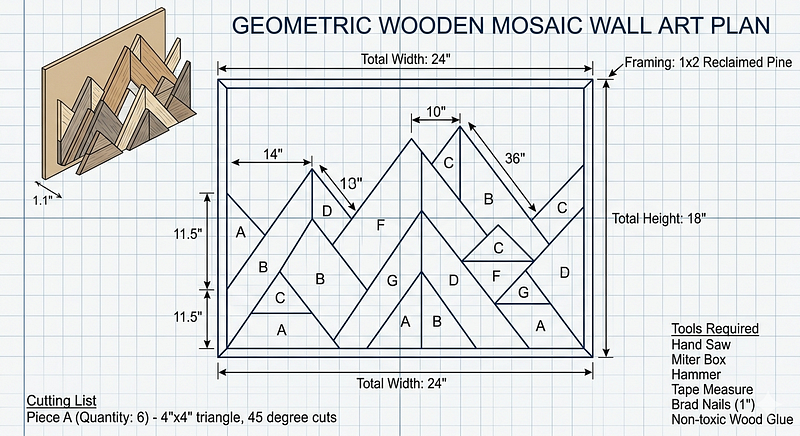
Action: Sketch your layout on paper first, or even draw a rough guide directly onto your plywood backing board. This visual aid will be your reference for every cut.
Step 2: Measure and Mark Your Boards
Precision is key in geometric art. Your cuts must match your plan perfectly for the mosaic to fit together snugly. We start by transferring the measurements from your sketch to the actual wood stock.
Tool Used: Tape Measure or Ruler, and Pencil.
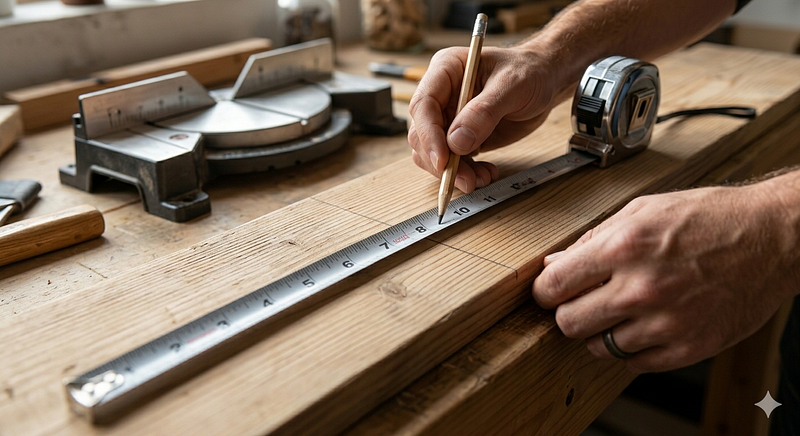
Action: When measuring, keep the tape straight. Mark your measurement with a clear, sharp pencil line or “V” arrow. Mark exactly where the cut should be made (this is usually the outside edge of your line). Remember: “Measure twice, cut once.”
Step 3: Cut the Pattern Pieces (Using the Miter Box)
This is the most critical manual step! The miter box is your secret weapon for making precise, repeatable angles (45 and 90 degrees) without electricity. It guides your saw so you don’t have to guess.
Tools Used: Hand Saw, Miter Box.
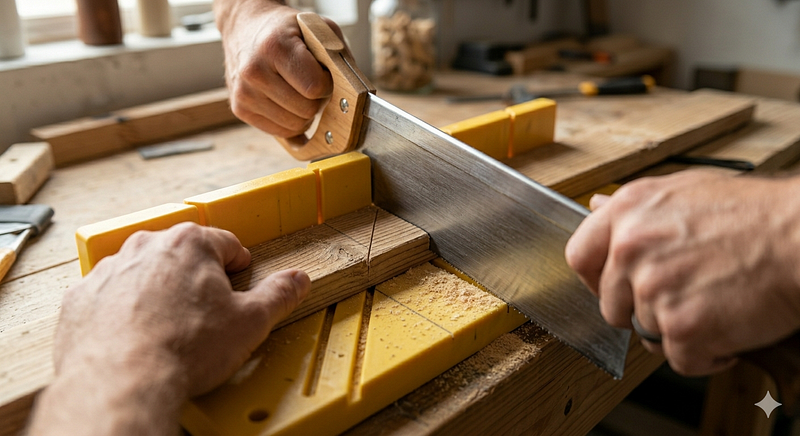
Action: Place your marked board inside the miter box, aligning your cut mark with the appropriate slot (e.g., the 45-degree angle slot). Hold the wood firmly against the back fence of the box. Use long, smooth, even strokes with your hand saw. Let the saw do the work; don’t force it. The result will be a precise geometric shape ready for assembly.
Step 4: Assemble and Secure the Pieces
With all your pieces cut, it’s time to build the mosaic! We will use wood glue and small brad nails to secure the pattern pieces to a backing board (like a piece of 1/4" plywood or MDF).
Tools Used: Hammer, Brad Nails, Wood Glue. (Small Clamps optional).
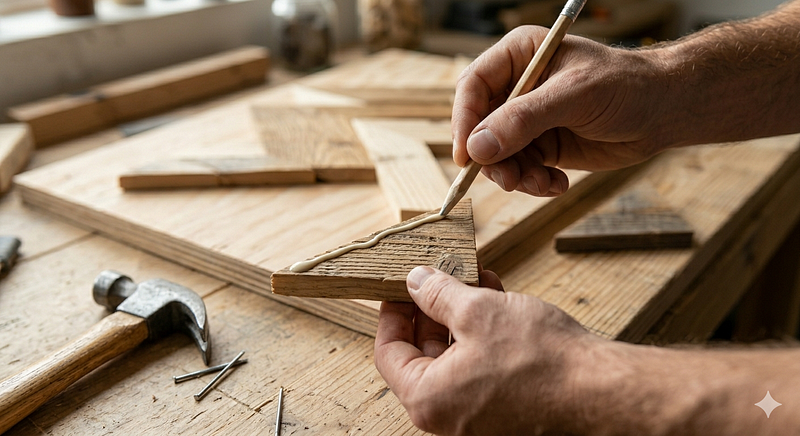
Action: Lay out your completed pieces on the backing board without glue first (a “dry fit”) to ensure they line up with your plan. Once you are satisfied, lift each piece, apply a thin bead of wood glue, and replace it. While the glue provides the long-term bond, use small brad nails (one or two per piece) to hold it instantly and keep the pieces flush. If you have clamps, you can use them to apply pressure while the glue dries, but brads are often sufficient for thin stock like this.
Your Finished Masterpiece!
You did it! Once the glue is dry, you can finish your art piece.
- Sanding: Lightly hand-sand any sharp edges or rough spots with 120-grit and then 220-grit sandpaper.
- Finishing: If you used reclaimed wood (like our pine example), you can leave it natural or use a clear matte sealant. If you used new wood, you can apply wood stains in various tones (as shown in image_0.png) or use craft paint for a pop of color before mounting it to the wall.
Standard Blueprints
This project uses a layered approach. Below is a diagram showing how the pieces are organized and assembled into the final geometric mountain motif.
(Note: The links below are affiliate links. This means that if you choose to make a purchase, I will earn a small commission at no additional cost to you. I only recommend tools and materials that I truly believe are quality and appropriate for a beginner project like this.)
- Hand Saw: [Buy on Amazon: Crosscut Hand Saw]
- Miter Box with Saw: [Buy on Amazon: Manual Miter Box and Saw Set]
- Small Claw Hammer: [Buy on Amazon: Beginner’s 16oz Hammer]
- Measuring Tape: [Buy on Amazon: Compact 25' Tape Measure]
- Wood Glue: [Buy on Amazon: Non-toxic Wood Glue]
- Brad Nails: [Buy on Amazon: Set of Assorted 1" Brad Nails]
I found inspiration for this project in this guide “Woodwork101”, in this guide you can find a lot of interesting projects for beginners.


Comments
Post a Comment